|
The above briefing notes were written by Paddy Hine when a Flight Commander
on 93 Sqn and Brian Butterworth kept Paddy's handwritten notes.
This particular brief was obviously given on the DFCS course
as the base is West Raynham. Paddy is leading and the other members
of the formation are all well known fighter pilots of the time who were
either course students or DFCS staff.
ATTACK FORMATION (OFFENSIVE)
Comments in red
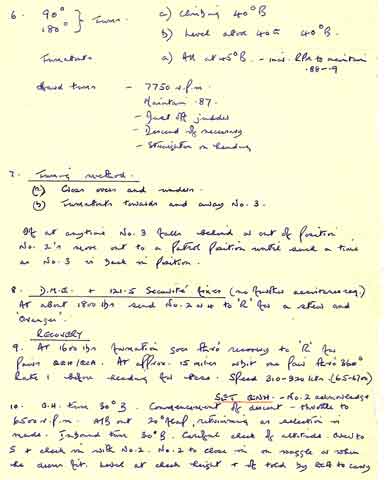
6. 90° ) Turns a) Climbing 40° B This is the difficult part of the exercise. Everything is done at close
180°) b) Level above 40G 40° B to the limits of the aircraft, for protection of the formation against
attacking fighters, particularly at high altitude. In 90° turns the aircraft
on the outside of the turn slides through line astern and ends up
parallel abreast on the other side. 180° turns are just 2 90s.
Slightest delay, or inaccurate bank and it is very easy to lose one's
position. As you are operating on the limit it is not easy to make
up for mistakes. It takes a lot of practice. Above 40,000 ft the Hunter
started to be on a 'knife edge' to maintain height in turns without a
lot of power being used. Thus, 40° angle of bank gave everyone
a better chance of keeping together in turns. Turnabouts, above
40,000 ft, invariably required full power, plus some loss of height.
Turnabouts a) All at 45° B. - Inc RPM to maintain Turnabouts are different from 180s in that the pair elements
.88-.9 turn without doing crossovers. The reason turnabouts are
called is to get the formation to face a threat more quickly.
The downside is a brief period when the pairs are line astern
(at the 90° point) and so rear cover is momentarily poor, but then
the formation knows where the threat is by turning towards it.
Level turns - 7750 r.p.m.
Maintain .87.
- Just off judder This means the aircraft is close to the stall - very small room for error.
- Descend if necessary
- Straighten on heading
7. Turning method
(a) Cross over and under. The general rule was that the higher pair crossed "over" the top of the
lower pair, and vice versa. Which pair would be high depended on sun position.
The procedure was for pairs to be - 'stepped up, down sun'.
(b) Turnabouts towards and away No.3. A turnabout towards No.3 meant that No.3 would be in the lead for the first
90° and blind to the other pair. After passing through the 90° point,
the No.3 would start to look out over his shoulder for the lead pair
to come in sight. A turnabout away from No. 3 reversed this situation,
but there was always that slightly vulnerable point when, after going
through 90°, the No. 3 would be belly up for a time to the lead pair.
It was always thus very important that the turn rates were positively
maintained throughout the manoeuvre.
If at anytime No.3 falls behind or out of position,
No.2's move out to a Patrol Position until such a time Patrol Position: No 2 moves outwards and to a line abreast position
as No.3 is back in Position. so both aircraft improve mutual lookout cover to the rear.
8. D.M.E. + 121.5 Securité fixes (no further assistance req.) Emergency calls would not normally be used for routine
navigation. It is just covering the (hopefully unlikely)
eventuality of a situation where the formation might be
running low on fuel and uncertain of their position (who
said lost!!). This was in the aftermath of the story of the
"Expensive 33rd" which referred to No. 33 DFLS Course
where 6 Hunters were lost on a sortie through fuel and
weather adversities. In those days there was a lot of
'cavalierism' on DFLS, and it was even considered a bit
'infra-dig' to be heard calling base for a 'check steer'.
But the 33rd aftermath changed all that - hence the
"Securit�" briefing note
At about 1800 lbs send No.2 to 'R' for a steer and
'Oranges'. Oranges is the codeword for the weather state at base.
Recovery
9. At 1600 lbs formation goes thro' recovery to 'R' for
Pairs QGH/GCA. At approx. 15 miles orbit one pair thru' 360° The orbit splits the formation into 2 pairs for recovery
Rate 1 before heading for base. Speed 310-320 kts. (65-6700) and individual pairs GCA. This is slightly different from
the initial brief but in a Phase Brief it is necessary to
cover all aspects. A Pairs Tactical QGH/GCA gives a
formation the quickest way to get all four (or more)
aircraft down in bad weather. A standard Pairs QGH/GCA
may be performed where there is no fuel shortage issues,
and/or that the receiving base is not geared to high
density GCA recoveries.
Set QNH. - No.2 acknowledge. QNH is the altimeter setting so that it shows the height
above sea level at base, i.e. airfield height. Once the
formation is above 3 -4,000 ft everyone sets their
altimeters to 1013.2 (QNE) so that regardless of pressure
variations, all aircraft airborne are flying at heights
relative to the same system. These heights are then
referred to as Flight Levels. Setting QNH must have
been the practice at that time. Later in the 1960s and
1970s the procedure was to set QFE, as you descended below
the transition level, which gave an altimeter reading of
Zero at touchdown - much easier to calculate height
against distance when doing an ILS or TACAN approach.
10. O.H. turn 30° B. Commencement of descent - throttle to
6500 r.p.m. A/B out 20° flap, retrimming as selection is
made. Inbound turn 30° B. Careful check of altitude. Over to
S & check in with No.2. No.2 to close in on waggle or when Ldr makes small waggle of wings to signal to No.2 to
he deems fit. Level at check height & if told by carry come into close formation. Usually just before entering
cloud when cross cover not so essential.
End of Page 4.
(Thanks to Chris Stone for being the Technical Advisor for this series.)
|